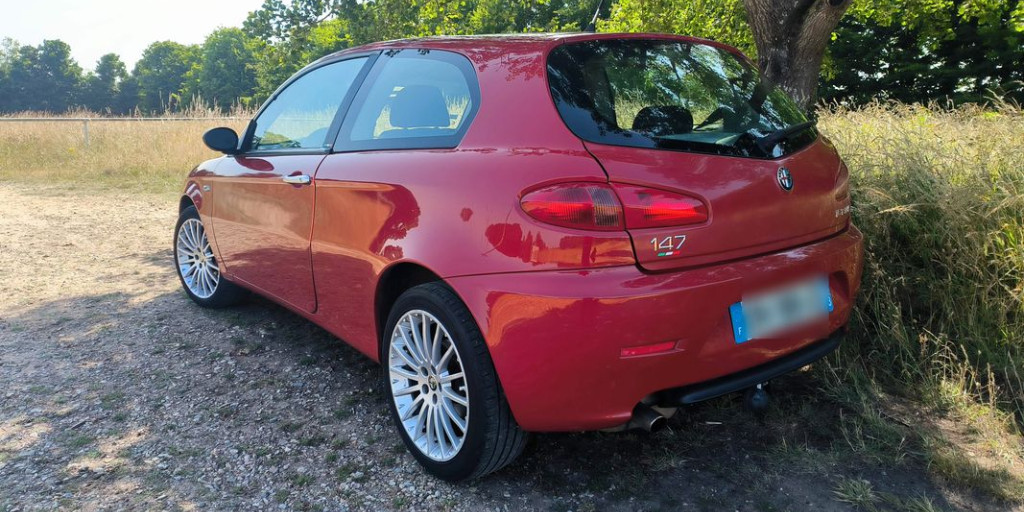
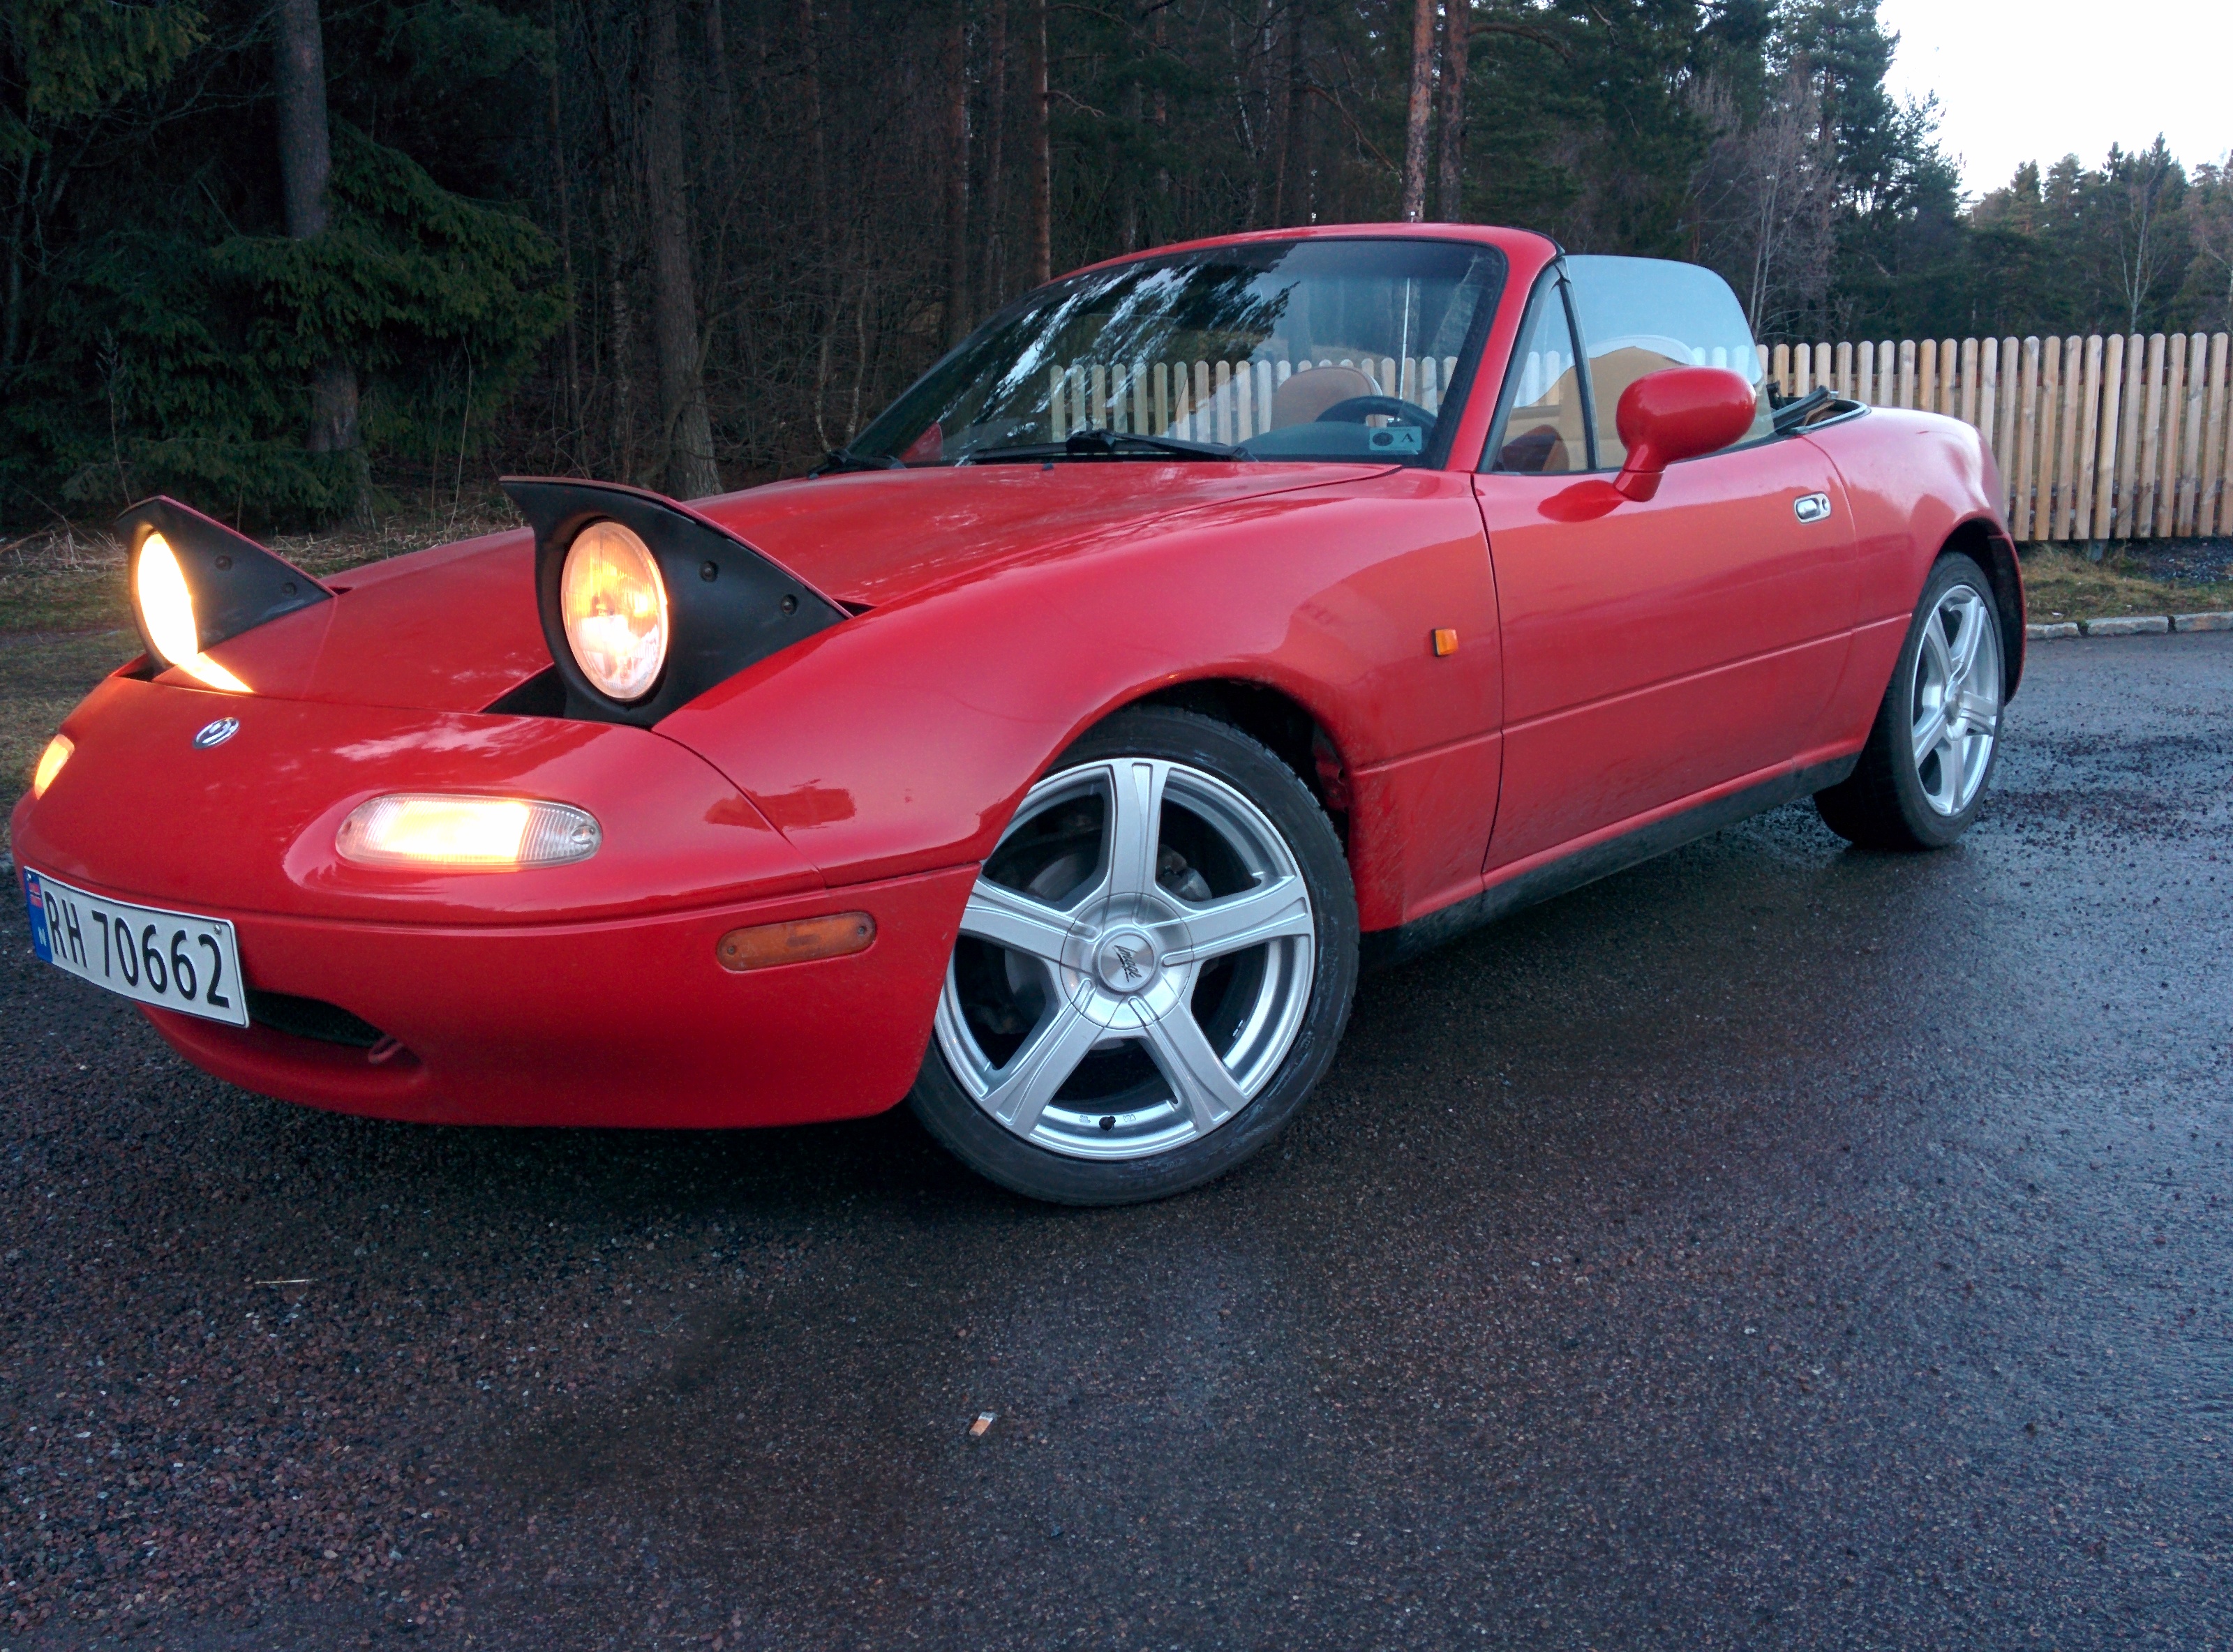
This afternoon, I graduated from “has not yet owned an Alfa Romeo” to “currently owns an Alfa Romeo”.
Anyone who knows me will tell you I’m a car guy. And any car guy (as opposed to a Porsche guy or a Corvette guy or a Miata guy) will tell you that every car guy ought to have owned an Alfa Romeo. The problem is that in order to have owned an Alfa Romeo, you must first own an Alfa Romeo; and then, presumably, either you get rid of it or it gets rid of you, or you both get rid of each other. And until today, I had not yet owned an Alfa Romeo.
This afternoon, I graduated from “has not yet owned an Alfa Romeo” to “currently owns an Alfa Romeo”. Specifically, a 2007 Alfa Romeo 147 1.6 TS. At some point in the future, I will move on from “currently owns an Alfa Romeo” to “has owned an Alfa Romeo”, thereby completing my car guy journey; but that will take a lot of work and a bit of money, although in theory I should be able to flip it for a decent profit.
Yes, it’s red, and yes, it has little Italian flags all over.
Currently planned work:
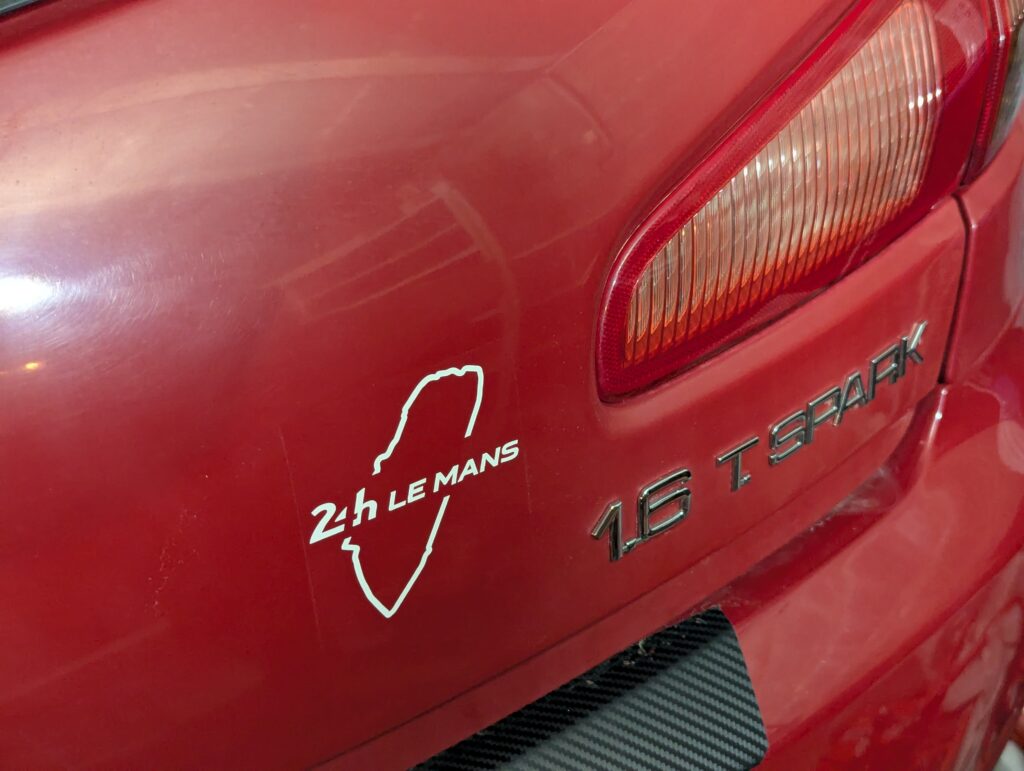
Install “24h Le Mans” sticker on trunk lid for immediate 5 bhp boost
Change all fluids and filters
Replace rear wiper blade
Polish headlights
Investigate lifter tick
Replace clutch pump and / or follower and / or hydraulic line
Replace passenger side window regulator
Replace driver side window and mirror controls
Replace trunk lid lock actuator
Fix driver’s seat release
Fix or replace various bits of interior trim
Replace gear shift lever knob, possibly with a shorter one
Replace whip antenna with either bee sting or shark fin
Maybe I’ll even remember to post updates.
Update: 5 bhp boost unlocked
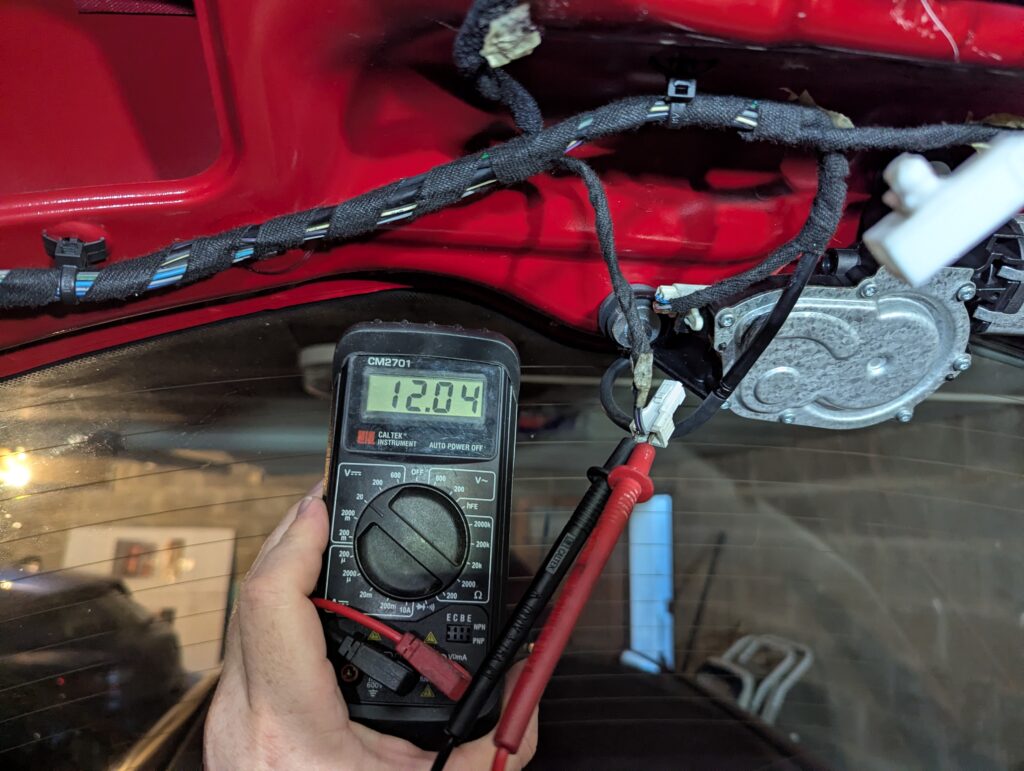
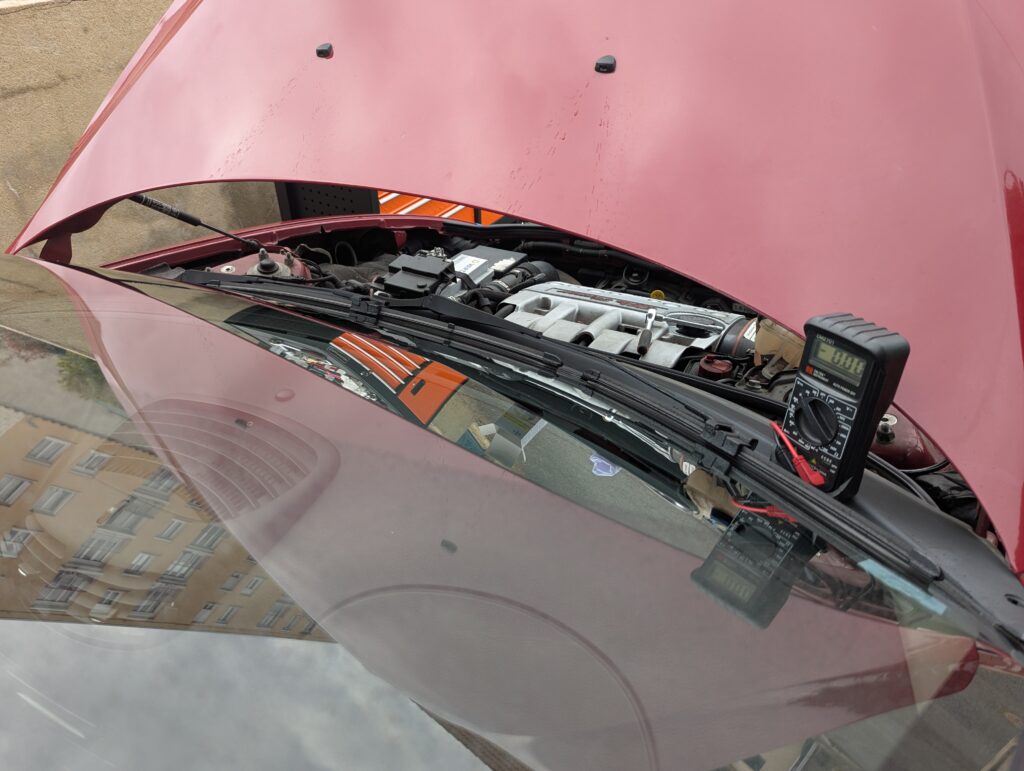
Update:of course my Italian car has electrical gremlins.
Update 2026-03-16: I had low washer nozzle pressure and assumed the pump might need changing. Only after ordering a replacement pump from a breaker did I realize that the real issue was that the washer hose was getting pinched when I closed the hood. Cutting the cable ties that tied it to the hood strut solved the issue.
Update 2026-03-19: It passed inspection today, with a slew of minor defects but little I wasn’t already aware of and nothing I can’t fix.
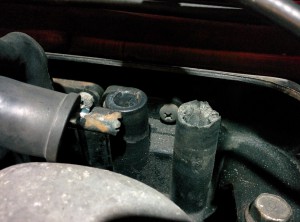
While my bug-eyed baby is in the shop for a full respray, let’s flash back to May, when I discovered—ironically, while trying to help someone diagnose an ignition issue—that my coil pack was hanging on by the skin of its teeth.
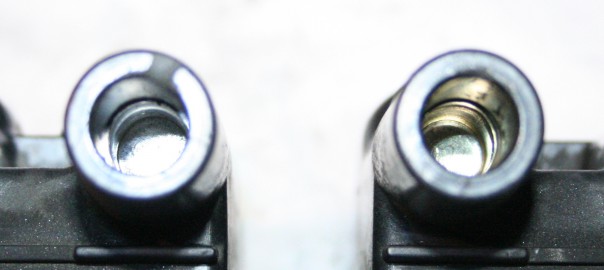
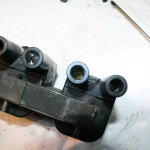
Closeup of the #4-#1 (driver’s left) coil on my 1993 Miata and the tip of the #4 HT lead. Both posts show damage from arcing due to corroded connectors and sockets.The image to the right shows what an ignition coil is not supposed to look like. I only have myself to blame for not checking the condition of the coils and HT leads before buying the car.
Quick recap: an ignition coil is an engine component that converts the low voltage from the battery to the high voltage required to create the spark used to ignite the fuel-air mixture in the combustion chamber. Coils can be arranged in different ways: a single coil serving multiple cylinders through a mechanical distributor, individual coils for each cylinder, or individual coils for each pair of opposite cylinders. In the latter case, each spark plug fires twice per cycle: once at the end of the compression stroke, to ignite the fuel-air mixture, and once (needlessly but harmlessly) at the end of the exhaust stroke, which coincides with the end of the opposite cylinder’s compression stroke. The Miata‘s four-cylinder B6 engine uses this “wasted spark” arrangement with a coil pack consisting of two coils around a shared laminated iron core, mounted in a frame between the rear of the engine and the firewall. Each coil has two sockets numbered (from driver’s left to driver’s right) #4, #1, #2 and #3. The numbers correspond to the cylinders served by the coils: the left coil serves the rear (#4) and front (#1) cylinders, and the right coil serves the middle two (#2 and #3).
The ignition current is delivered from the coil to the spark plug by an HT lead, which is little more than a high-quality electrical wire with connectors at each end that fit in a socket on the coil and onto the spark plug (with the engine block serving as the return path). If the connection between the HT lead and the coil socket is poor (be it due to dirt, corrosion, mechanical damage or other causes), the current will arc across the gap, resulting in damage to both the lead and the socket. In my case, the arcing developed enough heat to bake the plastic casing, causing it to crumble when I pulled the lead out.
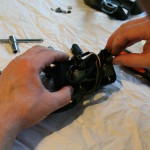
A new coil pack would have set me back quite a bit, so I got hold of a used one and refurbished it. The slideshow below illustrates the process.
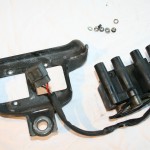
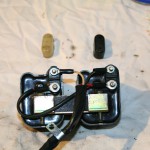
This is the used coil pack I got hold of from a fellow member of the Norwegian Miata club. The mounting bracket is broken, but that doesn’t matter since I can reuse the bracket from my original coil pack.
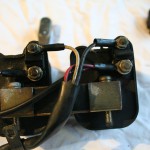
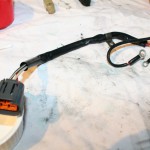
The input terminals after removing the caps (visible in the background). The bottom leads supply power, the top leads control the ignition.
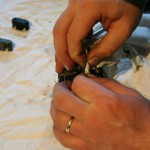
Disconnecting the wiring from the input terminals.
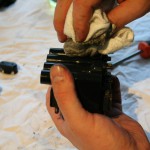
I cleaned all exterior surfaces as best I could by first wiping the grime off with a soft cloth soaked in naphtha, then rinsing the parts with water before drying them with a clean rag.
Coarse tissue paper and cotton swabs for hard-to-reach nooks and crannies.
The #4 socket has visible corrosion (verdigris), while the #1 socket is almost pristine. The #2 and #3 sockets don’t look too bad apart from some dirt and deposits. Note that the #4 and #2 sockets seem to be made of brass or some other copper alloy while the #1 and #3 sockets seem to be made of steel.
The #4 socket has visible corrosion (verdigris), while the #1 socket is almost pristine. The #2 and #3 sockets don’t look too bad apart from some dirt and deposits. Note that the #4 and #2 sockets seem to be made of brass or some other copper alloy while the #1 and #3 sockets seem to be made of steel.
A closer look at the corrosion in the #4 socket, after I had tried to clean some of it off with cotton swabs soaked in naphtha. I could have done a better job on the casing…
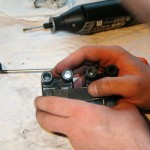
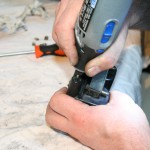
Carefully brushing the sockets with a Dremel #537 brass wire brush at 15,000 rpm. Harder than it looks, because the brush is quite narrow (I tried to bend the wires into more of a cone shape, but didn’t have much luck) and I couldn’t angle it much without hitting the rim of the socket with the brush spindle.
The result of about an hour’s work with the Dremel. No corrosion or dirt left except in the retaining groove (barely visible about halfway up the socket) which I simply couldn’t reach.
Once again: naphtha, water and a dry cloth.
The wiring also got the naphtha treatment, followed by a liberal dose of isopropyl alcohol on the shiny bits.
Everything goes back where it was. It doesn’t get much simpler than that.
The original nuts and washers look almost like new after a good soak in a cup of naphtha.
I fitted the refurbished coil pack with new 8 mm HT leads and it fired right up. Four months and a few thousand kilometers later and the plugs and sockets are still shiny.
The only issue remaining is that the new coil pack’s bracket is cracked, as shown in the pictures above. The old coil pack has separate cores for each coil, while the new one has a shared core for both coils, so while the brackets are nearly identical, the screw holes don’t line up. I need to drill new holes in the old bracket so the new coil pack will fit. I didn’t have a drill bit of the correct diameter available and was impatient to get the car back on the road, so I’ve been driving around with a cracked bracket. It hasn’t shaken loose yet—knock on wood.
If any other Miata owners read this, I’d love to hear from you about the condition of your coil pack and especially about any uneven wear or corrosion on coil sockets and HT lead tips. I have a hunch that the #4 socket is particularly vulnerable, although I have no idea why.
New rims¹ on my little bug-eyed baby, because one of those that came with it was bent (not noticeable to the naked eye—I only found out when I went to have them rebalanced). I also removed the spacers that a previous owner had mounted on the rear wheels. This made a world of difference. The ride is much smoother, and the car now absorbs bumps and potholes firmly instead of crashing over them.
This is basic physics. Spacers increase the mechanical advantage of the wishbone² and necessitate upgraded springs and shocks, whereas this car came fitted with aftermarket shortened springs and adjustable shocks which seem to be set to the firmest setting (I can’t easily check because the adjustment knobs are missing). I also think lateral stability improved a bit, but I’m still not entirely satisfied. However, I’ve already blown over £1,000³ on parts, so new tires will have to wait.
I also replaced the PCV valve and grommet in the hopes that it would ameliorate the idle speed issues, but it didn’t. I will probably have to refurbish the ISC valve and / or the air valve; my guess is that some of the moving parts in the air valve stick when cold. The new PCV valve and grommet should however stop aerosolized engine oil from spraying all over the camshaft cover and inlet manifold.
Next project for a rainy day: clean and polish the camshaft cover and replace the leaky gasket.
These are the downsides to buying a 22-year-old sports car whose previous owners thought they knew what they were doing…
¹ Martins Image Arctis 7″×16″; it’s hard to find sporty rims in that dimension. I have a set of the relatively rare love-’em-or-hate-’em stock Mazda 14″ “daisy wheel” rims, but they need sanding and respraying, and the hubcaps are missing. I might just PlastiDip them for now and use them for snow tires.
² A double wishbone suspension is not a classical example of lever and fulcrum, because the effort (weight of the car on the wheel) and resistance (spring) are on the same side of the fulcrum (inboard end of the wishbone). However, the principle and the equations are the same.
³ I get most of my parts from the UK, which apparently has a *huge* market for new and used MX-5 parts.
I dag går det T-bane direkte fra Romsås (der jeg bor) til Blindern (der jeg jobber). Likevel tar det omtrent dobbelt så lang tid med banen enn med bil i rushtiden.
9. desember blir rutene lagt om, og det blir ikke lenger direkte forbindelse. Regnestykket havner enda lengre i bilens favør.
Petter Reinholdtsen skrev nylig om Bitfactorys bensinpris-app (iOS, Android) og mangelen på dokumentasjon av protokollen den bruker for å laste ned priser fra databasen deres.
Jeg har lenge lurt på hvorfor ikke Forbrukerombudet pålegger stasjoner å rapportere inn prisene slik at forbrukere kan sammenligne før de velger hvor de skal fylle. Det kan hende at de mener at det er nok konkurranse i markedet, eller at det ville være en urimelig kostnad. Sistnevnte er imidlertid ikke et holdbart argument iom. at alt er automatisert; det ville aldri være snakk om manuell innrapportering. Continue reading “Bensinpriser”